
LightHouse as we mostly know is a Wonderful Tool for Testing Frontend Performance in Chrome Browser. Not only does it give an insight into Performance Improvement that we can make in our front-end application but it also gives an idea around SEO and Web accessibility.
Here is a sample view on LightHouse run in indianexpress.com
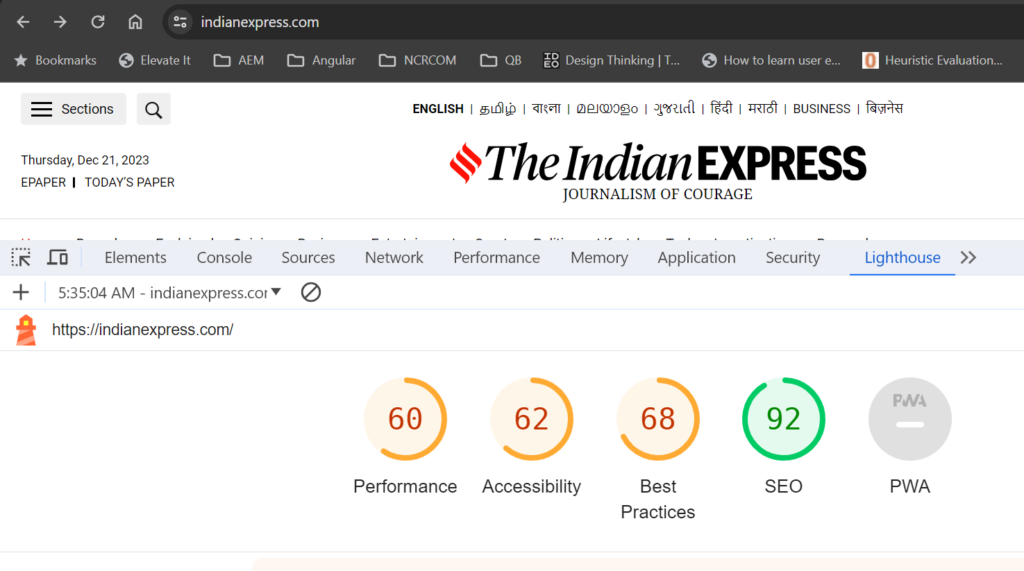
Here as a developer, we can see a Score on Performance, Accessibility, Best Practices, and SEO. Which is pretty good. But Lighthouse also provides a tool called LightHouse CI which can be integrated with your CI/CD pipeline and then allow you to continuously monitor the performance of your code checkins. This helps the site in many ways.
- Keeping Track of Performance Changes over time.
- Set and Keep Performance Budgets.
- Get a LightHouse Report with every PR.
- Compare Two Versions of your Code for Performance etc.
So let us start to understand how to set it up. To install lighthouse CI for a project you can install it as a npm package.
$ npm i -g @lhci/cli http-serverThis will install LightHouse CI and HTTP-server on your machine. Next, I will open up one of my existing react projects and set up lighthouse-CI for the same, I will add a file lighthouserc.json with the below details.
{
  "ci": {
    "collect": {
      "url": ["http://localhost:3000"],
      "startServerCommand": "http-server ./build/ -p 3000 -g",
      "startServerReadyPattern": "Available on",
      "numberOfRuns": 1
    },
    "upload": {
      "target": "temporary-public-storage"
    },
    "assert": {
      "preset": "lighthouse:recommended"
    }
  }
}
Now in the above config few things to observe are URL has a value of where react app will locally run. StartServerCommand will have the value of where the build folder is created, Here in case it’s ./build/ after this setup run the below commands on the command line.
npm run build
lhci autorun
For my react app I am getting 15 results a screenshot of what I see –
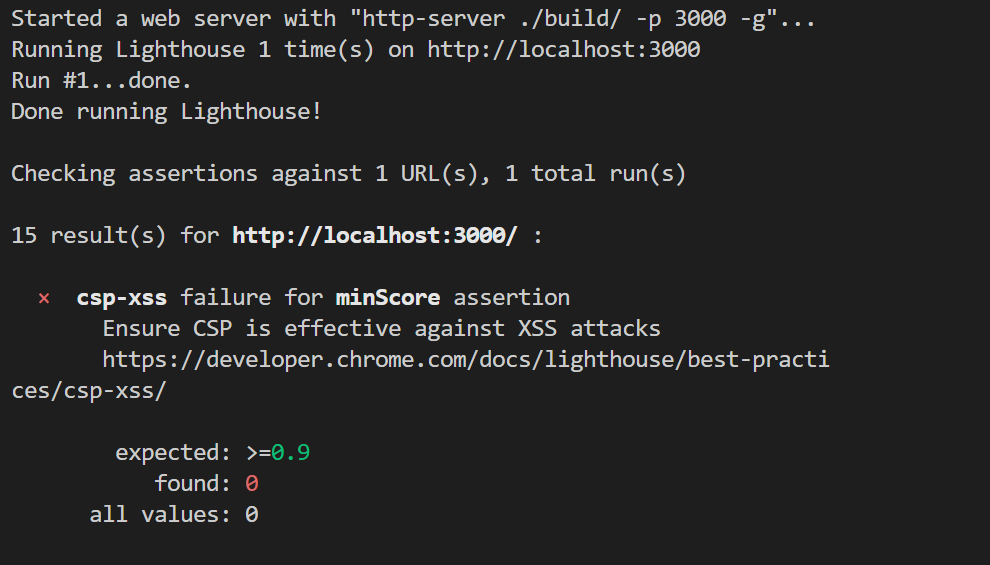
This means that Lighthouse CI ran on the local code and found 15 issues for me to work on at the end of the run it also gives a path to a URL where it creates a report in HTML Format.
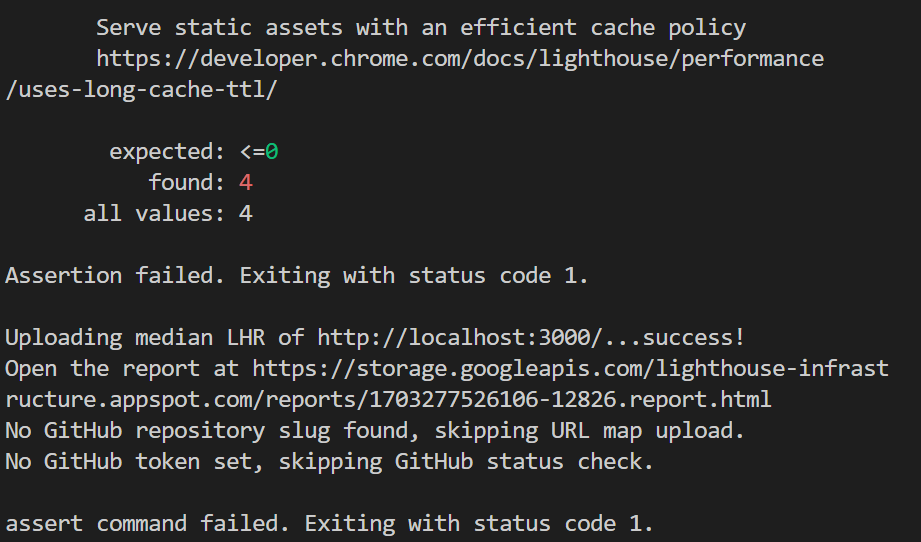
With the location at Storage.googleapis.com/…. Now if we make changes in code we can remove these issues. So far it’s a manual run on the machine. Now let’s see how we can integrate this into the Dev-Ops pipeline through GitHub-actions. The integration to the pipeline may differ based on how our DevOps infra is set up. In our case, we will try to do it by integrating it into our pull request workflow. For this in your project create a .github/workflows directory. Add a lighthouse.yml file in the directory with the following configuration.
# ./.github/workflows/lighthouse.yml
name: LighthouseCI

on:
   pull_request:

jobs:
   lighthouse:
     runs-on: ubuntu-latest
     steps:
       - uses: actions/checkout@v2

       - name: Setup node
         uses: actions/setup-node@v1
         with:
           node-version: "18.x"

       - name: Install
         run: npm ci && npm i -g http-server @lhci/cli

       - name: Build
         run: npm run build

       - name: LighthouseCI
         run: lhci autorun
Once Done Push your changes to Github. Now let’s try to create a PR.
git checkout -b "workflow-demo"
git add .
git commit -m "workflow-test"
git push
On Github we can see this –
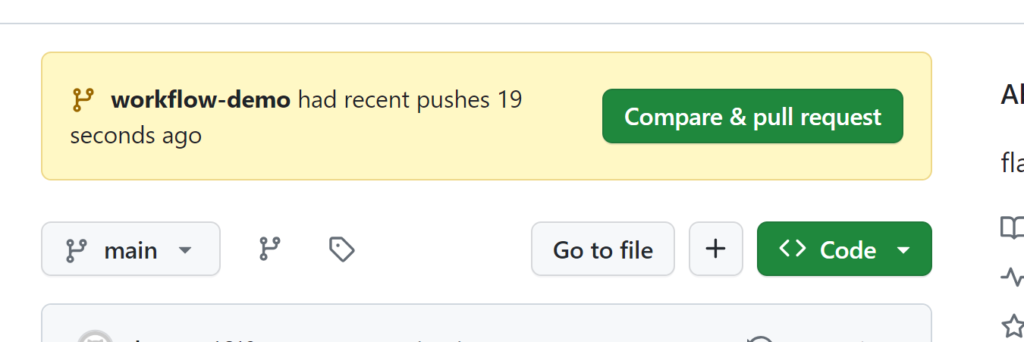
Clicking on “Compare and Pull Request” takes us to
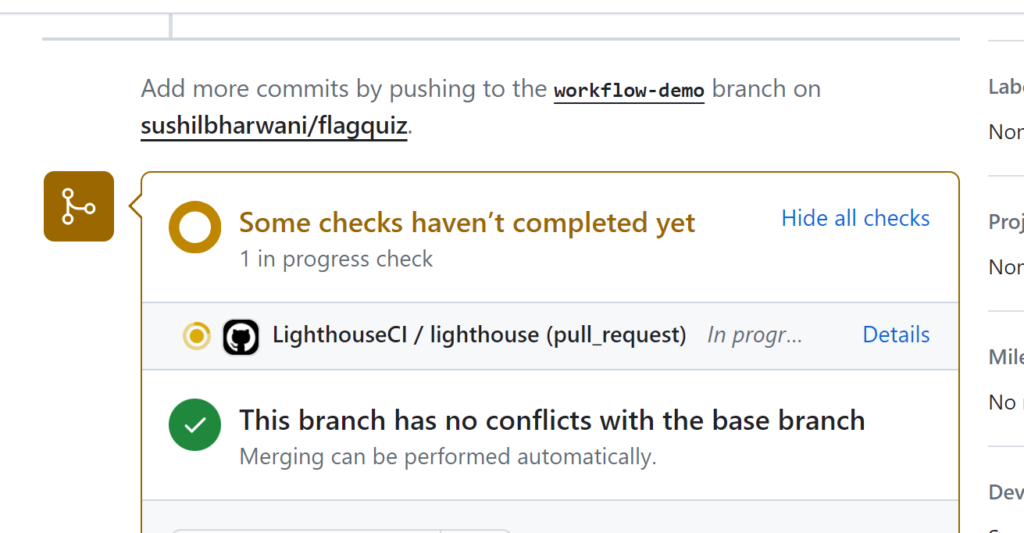
Here we can see that there are LighthouseCI checks in progress, We can click on the details links to see all checks running.
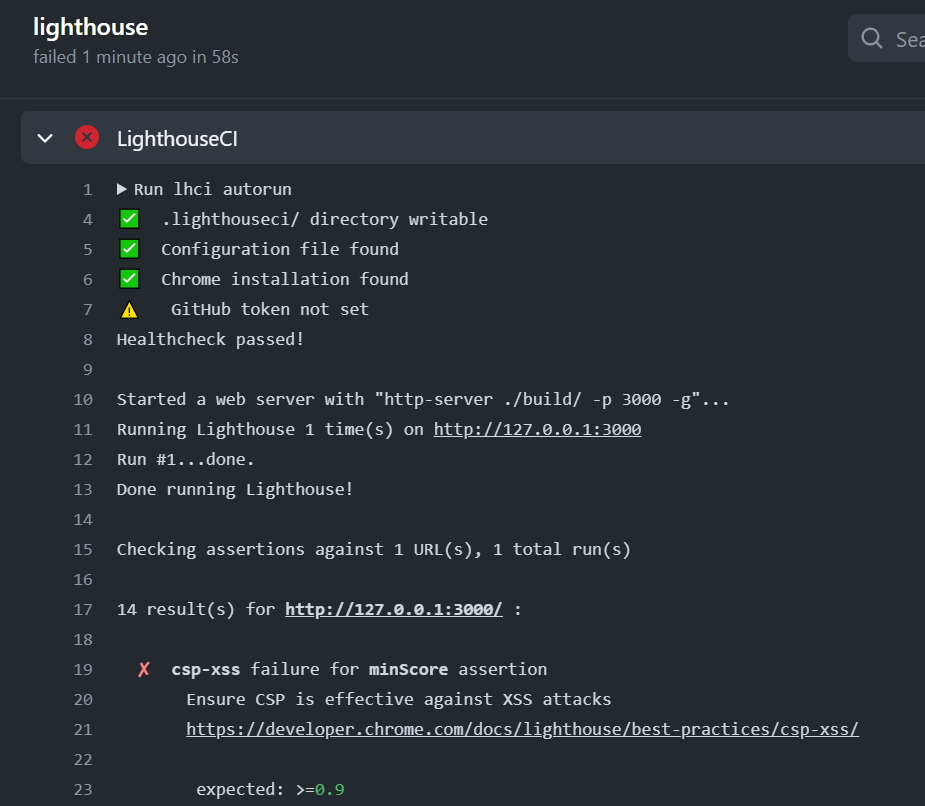
Finally, we can see that the pull request failed and the details show the same errors that we were seeing while running lighthouse CI on the local machine. So we have successfully configured the lighthouse CI for our react project and can work on the recommendations to make the project performance better.
Here is the Github link for the React Project – https://github.com/sushilbharwani/flagquiz With all configurations discussed in the article.
Additional Steps – Go to https://github.com/GoogleChrome/lighthouse-ci and install the App. You need to select atleast one repo and authorize the app and then you will get a LHCI_GITHUB_APP_TOKEN. This token needs to be setup in the build enviornment. We should see a status report from Lighthouse directly in the pull Github Actions output of a pull request with this new change.